 |
PenPal
MaxScript Release 0.50 Beta (10/08/2003)
Copyright (c) 1998-2003 by Borislav Petrov, Bobo's Rendert**ls. |
SHORT DESCRIPTION
PenPal is an Animation Painting utility.
It lets you simulate effects like pen writing, brush painting, spray
coloring, water wakes and more...
It creates an animated texture based on the relative motion of two
objects.
HOW DOES IT WORK?
PenPal compares the distance between the pivot points of two objects ("Paper"
and "Pen") in Paper's object space and draws a trail along the animation
trajectory. A single bitmap is written for each frame, and the resulting
animation is applied as IFL animated texture to the Paper object. The Z-coordinate
distance can be used to control the Pen Up and Down state.
SOME EXAMPLES
Carving into Stone (PenPal b&w Mask for
Bump Map Letter)
Burning Metal with Laser (PenPal
Bump Map)
Wheel Track (PenPal Bump Map)
Color Stamps (Animated Ink)
FEATURES
Beta 0.5 (10/08/2003)
This version should run in MAX 4, 5 and 6, but will NOT run in prior
versions.
It was a quick job editing the code and there might be still features that do
not work as expected.
Beta 0.46 (7/28/98)
This version fixes a severe bug in the Slash Pen inheritant to the
switch to Rollouts in Version 0.45
An additional check for MAX 3.0 version is performed and an additional
message is displayed.
PenPal passed the tests for MAX 3 compatibility. If you find any troubles
when running in R3, please email
me!
Beta 0.452 (6/26/98)
After the panic caused by the bug, I had enough time to fix it the right
way...
Beta 0.452 will automatically detect the MAXScript version used and
switch PenPal to the right color multiplication mode. I will leave the
manual switched 0.451 for download in case you want to have control over
the bug :o)
Beta 0.451 (6/25/98)
A bug fix in MAXScript for R2.5 caused bug in PenPal! :o(
Beta 0.451 adds a checkbox which will let you select the MAX release
you are using prior starting PenPal texture generation. Using the wrong
version settings will cause wrong ink colors!
MORE ABOUT THE BUG: In MAX R2, there was a bug when multiplying
a color value and a float between 0 and 1. Instead of floats, one had to
use values in the range 0-255. This has been fixed in R2.5, and causes
PenPal to generate color values too high to be correct. The new compatibility
checkbox selects which range to be used - [0..1] or [0..255].
Beta 0.45 (2/25/98)
Replaced the UI Groups with Rollouts.
Added a new Random Seed value that lets you change the Spray appearance.
Replaced the "Random Spray Dots" button with a dropdown list with 3 options:
-
Random Spray Dots - Initializes the Random Seed once before starting writing.
The result is a random dot matrix for every single brush stroke.
-
TimeBased Spray Dots - Multiplies the Random Seed with the current frame
number. The result is a pseudo-random spray that changes over time, but
is constant for a certain frame number. Use this in conjunction with the
Fade Out function to have a noiseless trail over time.
-
Constant Spray Dots - Uses the Random Seed before writing every single
brush stroke.
Added support for Movies as Custom Brushes. You can load any AVI, FLC or
IFL file to be used as a custom brush. An additional field "Brush Frame"
will let you animate the brush in any way you like - it uses a Linear_Float
controller in TrackView to control which brush frame is shown on which
scene frame. When selecting a file with more than 1 frames, you will be
prompted to create keys in the current animation segment that let the animation
play from start to end.
PenPal will check the size on frame 1 only, so if the brush changes
its size over time, some frames might become cropped.
TIP:An easy way to create animated custom brushes
is creating a shape in MAX, adding an extrude modifier and material, and
animating some parameters. Render the shape to FLC or AVI and... voila!
NOTE that you should use a lossless CODEC like
RLE or similar for your AVI Brushes in order to get clean background color.
Or you can use FLC instead.
Added a new option that controls the form of the Fade Out Scale trail.
You can select from the dropdown list among these presets:
-
Linear (the old standard)
-
Square
-
InverseSquare
-
InverseCubic
-
Sine
[Fade Out Scale Types Example]
NOTE that these settings apply to the Fade Out Scale only. The Color
Fade Out will be always Linear. This is because in the case of Square and
Sine Fade the "oldest" brush stroke gets almost pure background color as
the fade out value comes close to 0.
Added a (very slow!) option for Recursive writing over exisitng PenPal
textures. Whan activated, this function loads the previously rendered texture
frame first and applies the actual PenPal brush over it. This way you can
lay multiple brushes and sprays over the same texture, or have two different
brushes on the same texture (like in example "Baby's First Steps" - originally
I used 2 different textures for the left and right footsteps.)
Please keep in mind this option uses the same code as the fade out,
but always starts redrawing from frame 0, so it progressively slows down...
I included the option because it was "for free" since the fade out code
was already there, and all I had to do was adding a new button...
You should consider compositing or mixing separate textures in most
cases instead.
Beta 0.42 (1/31/98)
Added a new checkbox that can turn off the automatic adjustment of the
Pen Up values when picking a new Pen Object.
Added a new checkbutton that can turn off automatic assignement of materials
to the Paper Object. Turn this off when you have adjusted a complex texture
including a PenPal IFL, and just want to rerender the texture.
Fixed some bugs in the Custom Brush Fade Out Scaling code that crashed
PenPal sometimes.
Created the Samples above... take a look at them! I might write some tutorials
on how to create these effects later.
Beta 0.41 (1/31/98)

Paper Object selection
To start working with PenPal, select the Paper Object first. In this
version, the Paper Object should be a Box, Flat Patch or a Flat Mesh with
Planar UVWmap.
In future versions, there will be support for more object topologies
and UVW settings like Sphere, Cylinder etc.
The Paper Object may be freely oriented in World
Space. Because the Paper's local coordinates and orientation are used,
you should animate the pen in the Paper's object space - in the Transformation
Manager, select "Pick" from the dropdown list and select the paper. Then
press "Animate" and set the pen animation.
Pen Object selection
This option is activated after a Paper Object is selected. The Pen
Object can be ANY animated object incl. Primitives, Lights, Helpers, Particle
Systems etc. If the object itself has no animation keys, and the Paper
Object isn't animated either, you will be prompted to make sure the Pen
has animated parents. You can have any hierarchy of objects to simulate
pen motion, pen up and down etc. After the object is selected, its "Show
Trajectory " checkbox will be automatically activated.
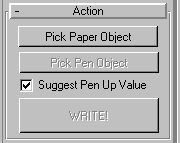
The WRITE! button becomes active after both Paper and Pen Objects
have been selected.
You can press it again everytime you have changed
pen or paper settings to generate a new version of the texture.

Path and File settings
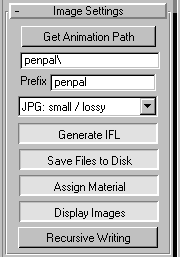
PenPal generates a sequence of Bitmaps and a single IFL file that lists
them to be used as an animation. The supported bitmap formats are JPG,
TGA, PNG and BMP. More might be implemented in the future. IFL gives you
more flexibility to mix frames from different animations, reverse the animation
or change speed etc. You can use EZlist(tm) to do this.
You can set the path the images are written to, and the prefix to be
used for both IFL and Bitmaps. By default, the path is a PENPAL subdirectory
of the directory the MAX scene has been loaded from. Be careful if you
load the scene AFTER starting PenPal. You should set the save directory
by hand or restart PenPal.
You SHOULD set a valid path before creating a texture!
You can enter your own path, or use the "Get Animation Path" button
to set an existing one.
The default Prefix for both Bitmaps and IFL is "penpal".
You can turn off writing to disk to just preview your settings.
You can turn IFL creation off in case you want to use your own IFL
created with another program like EZlist(tm) or MAX IFL Manager.
By default, the resulting bitmaps will be previewed in a VFB, but you
can turn this option off.
NOTE:The absolute path to the IFL will be included
in the Bitmap Map so you don't have to include it in the MAX Paths settings.
Paper Color settings - lets you set the background color for your
writing.
NOTE:The Bitmaps have no Alpha channel. If you
want to Mask the Texture with other maps in the material, you can use a
pure black or pure white background color and apply it as both Mask and
Map bitmap... A Generate Alpha function might be implemented later.

Paper Size settings
After selecting an object, PenPal checks the Bounding Box' Width and
Height of the object (local X and Y coordinates) to define a texture that
fits the Paper.
By default, there will be one pixel/unit, which means that an object
that is 800x600 units in X/Y directions will generate a sequence of 800x600
resolution Bitmaps. You can change the number of pixels per unit using
the Dots Per Unit field.
VERY IMPORTANT is to know that the Brush Size
settings are applied as ABSOLUTE values, so changing the Dots Per Unit
value will effectively scale the Brush relatively to the Paper Object.
NOTE:In the current version, PenPal will
NOT add an UVWmap modifier to the object. Most objects in MAX will activate
their coordinates automatically. In certain cases (see "Known
Bugs and Limitations") you might want to set up your own UVWmap modifier
and adjust the Paper Size to fit the UVWmap size. In future versions there
might be an automatic function for this...

Pen Colors:
There are two color picker fields for the pen color. By default, the
first (Ink) will be used for Procedural brushes, Custom brushes will retain
their original colors except the background. You can press the [Use Ink]
to replace all non-background colors of a Custom Brush with the Ink color.
The second (Mix) color becomes available when the [Spray] option is activated.
Press [Use Mix] to get a random color between the two colors in the spray.
Both Ink and Mix are animatable - you can press Animate and adjust
the colors over time. The dafault Controller Type is Bezier_Point3, but
you can use TrackView to change it and to adjust the animation.
NOTE that there will be no red brackets around
animated values in PenPal.
Brush Preview window:
Renders a single brush shape based on the current Pen settings.
Play Animation button
The Preview Window will not update automatically when you play the
scene animation. To preview any animation settings to the brush, press
the Play button. It will play from the current Time Slider position to
the end of the current animation segment.
Use the Update button to refresh the Preview with the actual settings after
you change the current scene time using the time slider. The number to
the right will show the currently displayed frame.
Get Custom Brush lets you select Bitmap file to use as Brush. The
color of the top left corner will become transparent to show the Paper
color. If the extents of the non-background colored part are higher than
120x120, the bitmap will be cropped.
The dropdown list will let you select from the currently implemented
Brush Shapes: Rectangle, Ellipse, Slash and Custom.
The animated values of the Bush use a Linear_Float controller. You
can change it to any controller type you want using TrackView.
Press the [Lock] button to lock Width and Height values together.
With Rectangle and Ellipse, both values can range from 1 to 90.
With Custom , both values can range from 1 to 120.
The Slash shape lets you go with the Width settings from -90 to 90.
An additional Thickness field becomes available for the Slash settings.
It can range from 1 to 40.
The [Spray] button lets you fill the brush shape with random dots.
The relation between number of ink and paper dots is controlled by the
[Spray Coverage] value. PenPal will generate random numbers between
0 and the Coverage value and draw an ink dot when the result is 1. The
default of 1 gives a coverage of about 50%. The max. value of 100 means
about 1% ink and 99% paper color. To use random dot matrix for the Spray,
leave the [Random Spray Dots] checked. If you uncheck it, the matrix
will remain fixed along the animation.
The [Brush Overlay] button is active by default when Spray is activated,
and when a Custom Brush is selected. In this case, the samples are added
together. Slow motion results in darker regions, fast motion in brighter
regions.
[Spray: Overlay On], [Custom
Brush: Overlay On]
If unchecked, the samples will cover each-other, resulting in a regular
look without darker and brighter regions.
[Spray: Overlay Off], [Custom
Brush: Overlay On]
NOTE that the default Overlay mode is MUCH SLOWER,
but is more useful for Spray simulations.
The Pen Subsamples field defines how many times a brush will be
calculated between two frames. Higher values will slow down the utility,
but will yield more fine results.
The Texture Blur field is the Blur Value to be set in the Bitmap
Map.
[Sample: Blur 5.0], [Sample:
Blur 1.0].
Blur is NOT rendered and saved with the BMPs,
but is just a parameter of the material, so you can adjust it anytime in
the Material Editor instead of rendering the whole texture again.
The [Use Pen Up] button is active by default. PenPal monitors the
relative Z position of the Pen to the Paper Object. When the Z distance
is higher than the Pen Up value, no texture is drawn.
[Sample: Pen Up On], [Sample:
Pen Up Off]
When the [Pressure Ramp] button is checked, both Pen Up and Pen
Down values are used. A pressure value is calculated based on the pen position
between these values, and the ink color is mixed with the paper color according
to the pressure percent. Values bellow Pen Down will paint with 100% ink,
values above "Pen Up" will not draw at all.
[Sample: Ramp On]
NOTE:The Pen Up and Pen Down values are set automatically
when the Pen Object is selected. The Pen Down value will equal to the lowest
Z distance of the Pen Object from the Paper's Pivot point, the Pen Up value
will be 1 unit higher than the highest Z distance in the animation. Don't
forget to check and adjust these values after picking a new Pen Object.
TIP:If you want to simulate different pressures
while writing, you can create a pen that moves along the XY plane without
going up in Z, and link a Dummy that will follow the pen and have its own
animation in Z direction. Select the Dummy as the Pen Object and set the
Pen Up value to be lower than the highest Z value of the Dummy. This way
you will be able to control the pressure of the pen without really taking
it up from the paper.
[Sample: Pen Up lower
than highest Z], [Sample: Pen Up higher
than highest Z]
The new Fade Out functionality lets you create trails that disappear over
time. In addition, the older brush trails can be scaled over time. These
functions lets you create bump maps for water wakes a la Splash Max.
NOTE that the Fade Out function will slow down
generation time significantly!
The Fade Out Time field is used to set the Life of the brush strokes.
After this number of frames, the trail disappears completely.
The Fade Brush Scale defines the scaling of the brush over time.
The default value of 1 means no scale at all, values from 0 to 1 will scale
down, from 1 to 10 will scale up.
The [Fade Out] button is unchecked by default, you have to activate
it to use the new fade out functions.
KNOWN BUGS AND LIMITATIONS
MAXScript cannot set pixels beyond the left and rigth bitmap borders. This
means that even when a small part of the Brush shape tries to write outside
of the Bitmap, there will be no ink at all.
THERE IS A WORKAROUND: You can add a UVWmap modifier
manually, set its Lenght and Width higher than the paper's size, and enter
the same values for the Paper Width and Height. This will let PenPal write
a wider texture that goes beyond the edges of the paper.
[PROBLEM:Animation wider than Paper], [SOLUTION:UVWmap
wider than Paper]
DOWNLOAD PENPAL BETA
Beta 0.50 for Max 4, 5 and 6
Beta 0.46 Encrypted for Max 2, 2.5 and 3.x


