|
Gridify
MaxScript Release 0.5 Source (4/24/2003)
MaxScript Release 0.4 Source (2/25/2000)
MaxScript Release 0.3 Source (12/10/1998)
Copyright (c) 1998-2003 by Borislav Petrov, Bobo's
Rendert**ls.
|
SHORT
DESCRIPTION
Gridify is a polygon modeling
utility that lets you split whole meshes or face selections into smaller
segments.
It is very useful for increasing mesh
detail when working with low-poly models and MeshSmooth.
HOW DOES IT
WORK?
Gridify uses Slice planes to
cut the mesh into up to 20 segments in each direction.
After each slicing, it requires the mesh to be collapsed so
the next slicing can take place.
FEATURES AND VERSION HISTORY
Version
0.5 for MAX 4.x and 5.x (4/24/03)
- This version has the checkbox "Split To
Elements" added in v0.45 which allows you to explode the grid into
single quads.
- All Slice Planes will be added with Operate
On Poly option for better meshing.
- Reformatted the code for readability.
Version 0.45 for MAX 4.x (2/21/01)
- This "recompile" for Max 4 was
available to some people but somehow never appeared on this page.
- Added a checkbox "Split To
Elements" which allows you to explode the grid into single quads.
Beta 0.4 for MAX 3.1 (2/25/00)
- The MAX 3.x version is implemented as
MacroScript. Evaluate the source, customize a toolbar and drag the button from
the Bobo_s Tools category.
- Version 0.4 does not require separate controls
for Mesh Selection. It operates from a floater and requires the Modify Tab in
the Command Panel to be active. This means that the user can set a face
selection anytime WHILE working with Gridify. If there is an active Face
Selection in Command Panel, it will be used. I can be in an Edit(able) Mesh or
MeshSelect...
- Using high slice values (over 10) can be
slower than in 2.5 because of the slower Command Panel updates. All other
controls work as before.
Beta 0.3 for MAX 2.5
(12/10/98)
- Press the [Pick Object] button to select
the Mesh to be gridified. After selecting the object, its name appears on the
button. The Object should be convertible to mesh. It will be NOT converted to
EditableMesh until you specify so.
- The [Set Face Selection] button lets you
quickly add an MeshSelect modifier to the selected object and switches to
Modifier Tab so you can select faces to be used by the utility. You can select
faces manually if you wish. The Utility will check for existing modifiers on
the stack and will ask you to collapse the stack first before adding a new
MeshSelect Modifier. If you answer with no, no changes will be made.
- The [Use Face Selection] checkbutton is
unchecked by default. Check it (turns red) to use any available face selection
in the Object. When the button is unchecked, the whole mesh is sliced. This
very powerful feature lets you increase detail on face level - select a single
face or quad and split it up to 20x20 times to perform additional modeling
operations without affecting the rest of the mesh.
- The 3 Groups let you control the number
of slicing planes along the X, Y and Z axis separately. All 3 have identical
controls:
- The On checkbox is deactivated by
default. If you check it, the currently set number of slicing planes are
generated. If you uncheck it, the slicing planes are deleted again. If the Use
Face Selection checkbutton is active, the planes will affect the selected
faces only.
- The # value field lets you set the
number of segments to be generated - 2 creates one slicing plane, 20 generates
19 planes. You can change the number anytime INTERACTIVELY to adjust the
number of planes. You should work in either Wireframe or Shaded mode with
Edged Faces to see the result in the viewports. When the value comes over 10,
interactivity might be reduced on slower machines.
- The next value is used to set the OFFSET of the
slicing planes. The offset range is in percent of the width of a single
segment. (-99 to 99 %) (see animation below)

- The MIN and MAX checkbuttons and the numeric
value between them are used to set a BIAS of the planes - this is an
experimental feature in Beta 0.3 and might not make much sense. It slides the
slicing planes increasingly closer to each-other and allows for variable
segment size. (see animation below). The checkbuttons can be
checked individually or be both unchecked (default). They cannot be checked
together at the same time.


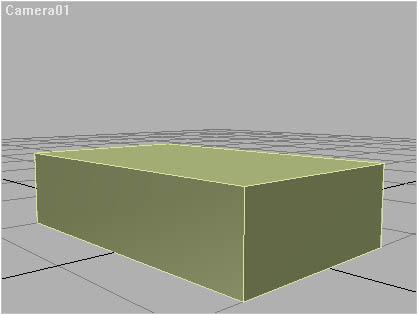
EXAMPLE
The following simple example shows the usage of Gridify for
modeling
with low-polygon counts.
Starting with a simple box without any
segments...
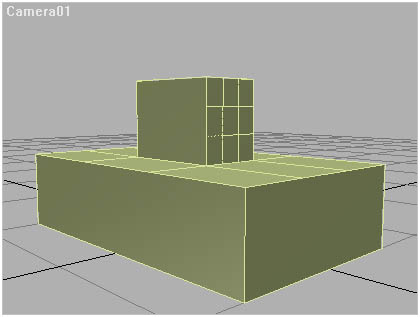
...We can add detail only where needed...

...And combine the slicing with the Extrude
function of EditableMesh,
then add detail
to one side of the extrusion...
...And extrude once again to get the final
shape...
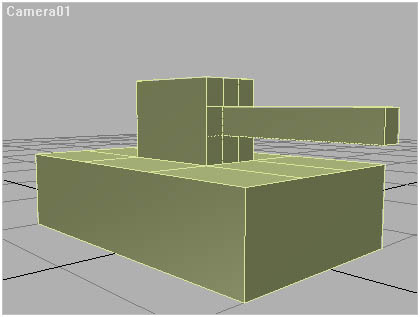
...which is ready for applying
MeshSmooth...
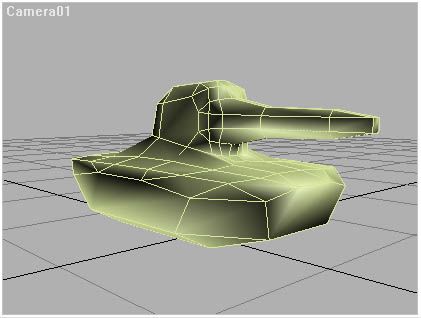
This way, we retained low detail all over the
mesh, while adding
higher detail only to
the right places.
DOWNLOAD
Gridify
Version 0.3
BETA for MAX 2.5
Version 0.4
BETA for MAX 3.x
Version 0.5 for MAX 4.x and 5.x