CONTENTS:
In this third step, we are going to extend the utility
to make it more professional.
Error traps, bitmap info function, scene clean up
and more will be implemented.
The complete script source can be found under
http://www.scriptspot.com/bobo/mxs2/mxs_tut/lesson03.zip
Download the ZIP file and copy its content into the
same directory as in LESSON 01.
utility lesson03
"Lesson03"
(
group "About..."
(
label lesson_label01
"Lesson 03 Script"
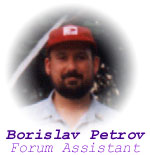
label lesson_label02
"by Borislav Petrov"
label lesson_label03
"Kinetix Forum Assistant"
)
group "Settings:"
(
radiobuttons geom_mode "Geometry" labels:#("Box","Sphere")
align:#left
This new UI element is a set of radio
buttons.
Radio buttons are similar to drop-down
lists, but allow the user to see all possible options all the time.
The options are listed in an array after
the labels: statement.
dropdownlist effect_mode
"Effect Mode" items:#("Luminosity","Red Channel","Green Channel","Blue
Channel","Alpha Channel")
Note the new 5th item "Alpha Channel".
With this change and an
additional line in the case statement in the code bellow
we extended the utility to use Alpha data.
spinner sphere_segs "Sphere Segments:"
range:[4,16,4] fieldwidth:40 align:#right type:#integer enabled:false
This is an additional value spinner which
is disabled by default.
The keyword enabled: can
be used for any UI element, and accepts boolean values - TRUE or FALSE.
Because the radio buttons show the Box
as default selection, we don't need the Sphere segments yet.
spinner base_size
"Base Size:" range:[1,1000,100] fieldwidth:40 align:#right
spinner multiplier
"Size Multiplier:" range:[0.1,10,2] fieldwidth:40 align:#right
spinner nth_pixel
"Every Nth Pixel:" range:[1,10,1] fieldwidth:40 align:#right type:#integer
button get_image
"Get Image File" width:140
edittext bmp_name "File" text:"c:\\mxstut\\m3.tga"
Note that the name has changed to m3.tga,
which is a NONEXISTING file.
We need this to test our Error Trap
:o)
label size_label "Image Size:???x???"
This new label is used to display the
size of the currently selected bitmap.
)
group "Action"
(
button start_process "LET'S DO IT!"
width:140 height:30 align:#center enabled:false
In this new group, the start_process
button is disabled by default.
It will be enabled after the Error
Trap has checked for valid image file.
button remove_all "Clean up scene" width:140
align:#center
This new button will let the user delete
all objects created by the utility.
)
fn Check_bmp_size bmp_n =
(
We are starting a FUNCTION DEFINITION
here.
FUNCTIONS are used to automatize scripted
actions that are used often by different parts of the code.
A function starts with fn
, has a user-defined name and accepts any number of parameters followed
by = and the function body.
The parameters have to be specified when
the function is called, and can be used inside of the function body only.
At the end of the function, one can specify
a calculated value which is returned as result. (We don't use this in our
case).
Our function is a PROCEDURE - it does
certain jobs and sets some object properties without returning any values
back.
try
(
MAXScript provides only one very basic
Error Trap in the form try (...) catch (...)
The statements inside of the try
body
are executed, and if ANY error occurs, the statements in the catch
body are executed.
bmp_check = openbitmap bmp_n
bmp_w = bmp_check.width
bmp_h = bmp_check.height
close bmp_check
size_label.text = "Image Size:" + bmp_w
as string + "x" + bmp_h as string
The function opens the bitmap with the
name sent as parameter and checks its size (See LESSON01).
If no errors are encountered while doing
this, the last line puts the size variables as text strings into a single
string.
This string is assigned to the .text
property
of the size_label
)
catch
(
start_process.enabled = false
If any errors have been encountered (the
only error could be: an existing file name has been opened and it wasn't
a bitmap),
the above statement will be processed
and the start button will be disabled, so the user cannot do anything wrong.
)--end of catch
)--end of function
on geom_mode changed state do
(
The radiobuttons element
returns a property called .state which contains the current
option setting.
The above line checks for changes to the
radio button settings.
if state == 1 then sphere_segs.enabled
= false else sphere_segs.enabled = true
In case the state has changed
to 1 (Box), the Sphere Segments value is not allowed and is being disabled.
In the other case (Sphere), the value
is needed and is being enabled.
)
on bmp_name entered txt do
(
This line checks if the user has entered
new text in the edittext UI element.
The events MXS scans for are ENTER and
TAB being pressed.
The new text is written in the variable
following the entered statement, in our case txt
file_check = getFiles bmp_name.text
The command getFiles followed
by a wildcard path name returns an array of the files found.
Since we call it using an unique file
name instead of a wildcard path, the result can be either a single name,
or none at all.
if file_check.count == 1 then
(
We check if the count of the elements
in the array equals to 1 (file found) or 0 (file not found).
start_process.enabled = true
If the count of discovered files is 1,
the file seems to be an existing one.
This means we can enable the start button
for now...
Check_bmp_size bmp_name.text
Now we call our self-defined function
with the name of the bitmap as parameter in order to update the Size Info
label,
and to make sure the encountered exisiting
file is REALLY a bitmap.
If the existing file isn't a bitmap, the
function will disable the start button again.
)
else
(
size_label.text = "Image Size:???x???"
start_process.enabled = false
This is what happens in case the getFiles
command did not find any files.
The Image Size label is set to UNKNOWN,
and the start button is disabled again.
)
)
on
get_image pressed do
(
pick_image =
selectBitmap caption:"Get Image File"
if pick_image
!= undefined then
(
bmp_name.text
= pick_image.filename
start_process.enabled = true
Check_bmp_size bmp_name.text
Because we know that the selectBitmap
cannot select anything else than a valid bitmap, we enable the start button.
We also update the Size Info.
)
)
on start_process
pressed do
(
work_bmp = openbitmap
bmp_name.text
bmp_w = work_bmp.width
bmp_h = work_bmp.height
progressstart "Generating Objects..."
for h = 1 to bmp_h
by nth_pixel.value do
(
pixel_line
= getpixels work_bmp [0,(h-1)] bmp_w
if not progressupdate (h as float
/bmp_h *100) then exit
As mentioned in LESSON01,
the progressupdate
can be used to check for user Cancel/Esc.
In case the user has pressed Esc or the
Cancel button, a prompt appears.
If the user selects Yes, the progressupdate
returns FALSE.
The NOT statement inverts
it to TRUE and the if check executes the exit command.
The exit command cancels
all the loops and event checks and returns control to the main part of
the script.
for w =
1 to bmp_w by nth_pixel.value do
(
case effect_mode.selection
of
(
1: size_value
= base_size.value + multiplier.value*(pixel_line[w].r+pixel_line[w].g+pixel_line[w].b)/3
2: size_value
= base_size.value + multiplier.value*(pixel_line[w].r)
3: size_value
= base_size.value + multiplier.value*(pixel_line[w].g)
4: size_value
= base_size.value + multiplier.value*(pixel_line[w].b)
5: size_value
= base_size.value + multiplier.value*(pixel_line[w].alpha)
This additional line enables the access
to the Alpha channel of the bitmap.
)
case geom_mode.state of
(
We have this additional case check
to create different geometry according to the radio buttons state.
1: new_object
= box length:base_size.value width:base_size.value height:size_value
2: new_object = sphere radius:(size_value/2)
segs:sphere_segs.value
This additional line creates a sphere
object with radius half the calculated value, and segment count based on
the spinner value.
)
new_object.pos
= [w*base_size.value, (-h*base_size.value), 0]
new_object.name
= uniquename "3rd_Lesson"
new_material
= standardmaterial diffuse:pixel_line[w]
new_material.name
= new_object.name
new_object.material
= new_material
)--end w loop
)--end h loop
progressend ()
max views redraw
The max command provides
a way for executing standard MAX functions available through mouse clicks
or keyboard shortcuts in the main MAX UI.
For the whole list, check the MAXScript
Online Help.
This particular line executes the Redraw
All Viewports MAX command.
close work_bmp
)--end on button pressed
on remove_all
pressed do
(
This is the event check for the Clean
up button.
q_answer = queryBox "You are about to
delete all objects\ncreated by the Utility.\nAre you sure?"
The queryBox command prompts
with the specified text and two possible answers - YES or NO.
The variable q_answer becomes
TRUE when the user has clicked YES.
NOTE that
you have to use the "\n" character to denote CariageReturn (ENTER).
if q_answer then
(
q_answer can be only TRUE
or FALSE, so we don't need to write if q_answer == true then -
it is the same.
If the user has answered YES (TRUE)...
delete_array = $3rd_Lesson* as
array
...a new array is created containing all
objects with names starting with "3rd_Lesson".
Scene objects can be accessed using Path
Names beginning with the sign $ and the object's name.
You can use the wildcard *
to sequence all matching names.
delete delete_array
The whole array is deleted from the scene.
The delete command deletes
single scene objects, or (as in this case) arrays of objects.
)
)
on lesson03 open do
(
MAXScript provides you with a way to execute
code when the utility is starting.
You can use the on...open to
perform initialization works, like checking for the MAXScript version used,
opening floaters and rollouts etc.
A similar event check, on...close
lets you perform certain actions when the program is closing, like deleting
temp. files, closing floaters and rollouts etc.
Both require the utility name.
file_check = getFiles bmp_name.text
if file_check.count == 1 then
(
Check_bmp_size bmp_name.text
start_process.enabled = true
)
We perform the same
check as with the "Get Image File" button, but just once when the utility
is started.
This way the utility can make sure the
default image is really present.
else
(
messagebox "The Image file couldn't
be found!\nPlease select a valid one."
The messagebox command provides
just a text message with an OK button.
)
)--end on
)--end utility
Here is what happens when you execute the
script with
Sphere, RGB mode, Sphere Segments 4, Base
100, Scale 2.0, Nth 2
Have fun!
Borislav Petrov [FA]