Tagged 'Animation'

Procedural Motion Baker

23 votes

This script will convert procedural/hierarchical animation into keyframe animation. Adds support for IK-driven chains (HI - HD and splineIK).

Animation Range Tool

23 votes

This is a simple Macro script which makes it possible to manage and to save (txt files) several animations ranges.

Delete animation ranges by rigth click on it.

NEW: It's possible to assign a selected camera

Stick Locator

23 votes

Stick Locator
=============
version 1.2

written by Mayec Rancel

(macroScript)

Description:
Creates a point dummy, and parents it to the reference object's vertex/center,
using controller expressions.

This is useful to parent other objects to a specific part of a deforming
mesh, or an object whose transforms have been 'baked' (e.g. point cache).

I have found it specially useful, in FX work, for particle/fluid emitters.

Notes:
- Only the 'center' method can be used with splines.
- When using 'vertex' method, the dummy's rotation will align to the
Facial Animation Rig

22 votes

Create a complete head rig, with facial animation controls as recommended by Jason Osipa in his book 'Stop Staring'. Starting just with a head mesh, create bones for jaw, head,neck and eyelids. Also create a couple of spline controls for the eyes and the chin. Running the 'eyerig' script creates a rollout with pick buttons for all needed bones and meshes, then sets up the eye and head rigs, as well as placing a skin modifier on the mesh, with the required bones added, ready for vertex weighting. The rig also caters for 'fleshy eyelids' that move with the eye.

Isolate Track

22 votes

Isolate Track

When an object has several “object keyframes” of different parameters at the same frame time (e.g. a morpher with multiple targets, or baseObject’s radius and segments animated), all of these keyframes are displayed as one “grey object key” in the timeline.

Isolate Track popups (under mouse cursor) a rollout that displays all the animatable tracks of the current modifier stack selection, and quickly isolates the selected track keyframes in the timeline.

Keyframe Align

21 votes

Key frame align allows you to align an object over time based on key frames instead of placing a key on every frame. It will also align one object to another on every frame if needed. It can separate the position, rotation, and scale transforms. This script also works with biped. This was inspired by Jim Jagger's animated align and advanced align tools. I fixed an oddity with the rotation, it wont require it to be run twice on certain occasions. Latest update fixes an error with biped. A biped object with a modifier can now be interpreted by the script.

Store Frame Markers

21 votes

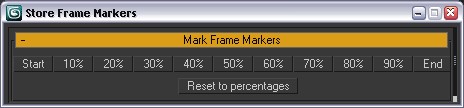
This is a simple little floater that allows you to store and recal frames in time. By default it sets markers at 10% intervals across the timeline. Shift+Click to memorize a frame number.

http://www.jonahhawk.com/scripts/StoreFrameMarkers.flv 


Coordinate Center Macros

21 votes

These are 3 simple macros I use to add shortcuts for the transform coordinate center options.

SOX Posture Blender

20 votes

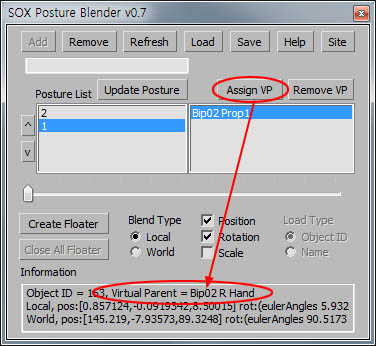
http://cafe.naver.com/pinksox/2894

v0.7 update : 'Virtual Parent' added

v0.71 update : 'Load Type' activated

v0.72 update : Floater bug fixed

v0.721 update : Impreved compatibility with lower version (Max 9 tested)

v0.723 update : "Undo" management has improved.

v0.724 update : Bug fixed

v0.725 update : update for 3ds Max 8.0

v0.726 update : update for 3ds Max 2013


Autoweight - Automatic skinning tool for 3ds Max

20 votes

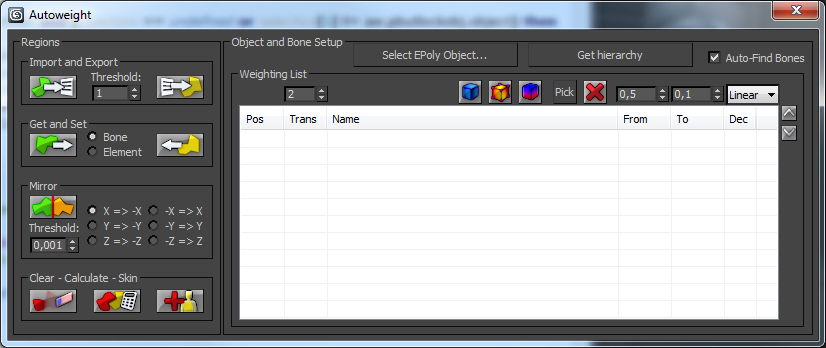
Autoweight is a script designed for 3D Studio Max helping you speeding up the skinning process of characters and machines.
You define special polygon regions and the script finds the appropriate bones, calculates the appropriate skin-vertices and sets up smooth transitions between those regions.

There are also Youtube video tutorials explaining the script step-by-step.

The new version 1.0 comes with an installer so you don't need to hassle around with the mzp-stuff anymore.

Syndicate content