Border Fill
Fills a border with quads. Selects the newly created faces (sometimes you want to do an inset afterwards) and verts (sometimes you might want to relax them)
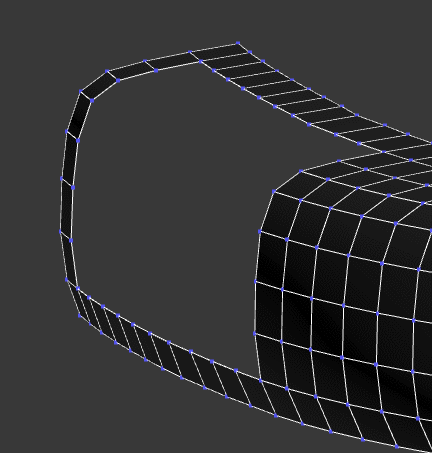
Installation: Run the .mcr file once. It creates a polyOp Border Fill item in the polyOp category under Customize UI, which you can then add to a quadmenu or assign a shortcut to it (that's what I'm showing in the preview gif). To use it, select a border vertex that defines the border corner and press the button/keyboard shortcut - this will fill a regular border. Or select two corners and press the shortcut, when filling irregular border. The border edge count has to be even.
Edit Poly support: If you don't need Edit Poly modifier support, you don't have to do anything else, if you want it, install the polyModOp function library.
| Attachment | Size |
|---|---|
| BorderFill.mcr | 5.39 KB |
Comments
.
What did you try and what didn't work?
Some of my scripts and MCGs :: 3ds Max SDK Intro for Scripters
pls help me!
I could not run the script
Peace
Master piece !
Master piece ! Thanks for sharing !
AMAZING
THANKS SO MUCH!! This is incredible!
excellent
Ottimo !
Thank you
Really nice !!! Thank you
Really nice !!! Thank you
THANX
THANX
Nice
Appreciate this, Marius charges for this so well done for making a freebie!
Can't get it to work
Edit: Never mind, it does work. Thanks for sharing!
I̶t̶ ̶d̶o̶e̶s̶ ̶n̶o̶t̶h̶i̶n̶g̶ ̶f̶o̶r̶ ̶m̶e̶ ̶i̶n̶ ̶M̶a̶x̶ ̶2̶0̶1̶5̶,̶ ̶n̶o̶ ̶m̶a̶t̶t̶e̶r̶ ̶h̶o̶w̶ ̶m̶a̶n̶y̶ ̶v̶e̶r̶t̶s̶ ̶I̶ ̶s̶e̶l̶e̶c̶t̶ ̶:̶/̶
Really nice !!! Thank you
Really nice !!! Thank you very much !! ( 3dsmax 2017 )