Corona Elements to Photoshop Automator
Corona Elements to Photoshop Automator (Drag and Drop MZP installer/uninstaller).
This tool automates the process of saving all Corona Render elements and stacking them as layers in Photoshop immediately after a render finishes. Drag and drop the MZP into 3DSMax viewport, it will launch an install/uninstall window. Installs to Main UI -> 'Custom Tools' in the Customise User Interface.
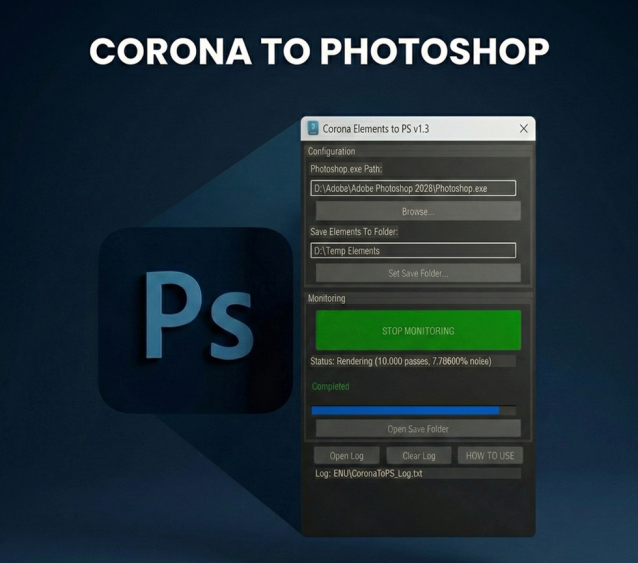
Step 1: Configuration Before you start monitoring, you must set two paths in the GUI: Photoshop.exe Path: Browse to your Photoshop.exe location (e.g., C:\Program Files\Adobe\Adobe Photoshop 2024\Photoshop.exe). Save Folder: Select the directory where your TIF elements will be saved. These settings are saved automatically in your 3ds Max ENU folder.
Step 2: Monitoring Click the "START MONITORING" button. The status will change to "Monitoring enabled. Waiting for render...". As soon as you start a render (F9/Production), the progress bar will track the render passes and noise levels.
Step 3: Completion When the render reaches its limit (passes or noise): The script saves all elements as 16-bit TIFs with Alpha to your selected folder. Photoshop is launched (or focused if already open). A custom script headlessly stacks all TIFs into a single document. Layers are grouped into a set named after your 3ds Max scene. Once finished, the status will show "Completed".
Troubleshooting No elements saving? Ensure you are using Corona Render and have elements added in the Render Setup dialog. Photoshop Errors: If Photoshop reports an error, it will be highlighted in red in the 3ds Max GUI. Click "Open Log" for more details. Admin Rights: This tool is designed to run without admin rights by staying within the AppData/Local/.../ENU directory.
Tested with Corona 13 and 3DSMax 2026